One great advantage to being a garden coach or a do-it-yourself homeowner is that you don’t have to do-it-all-at-once. Or make precise measured drawings if that’s not your thing. You can take time to be in the space, think things through, live with it for awhile, and change your mind.
Working and watching a garden develop over time is one of life’s great satisfactions, especially when you see new life finding a home in previously paltry habitat.
Dana, who lives not far from me in northwestern Connecticut, had an attractive and long-established island bed floating in her shady front side yard. She wanted to make the bed bigger and connect it to the rest of the landscape but wasn’t sure how to accomplish that.
The bed was packed with well-adjusted native and non-native perennials, a few shrubs and some nicely placed rocks, grouped under a couple native black cherry trees (Prunus serotina). Like many island beds, it seemed a bit adrift in a sea of lawn.
The adjacent area was scattered with tall black cherry trees, branched high and full of character. Beneath them, in shaded, mower-compacted soil, lovely mosses in the thin patchy lawn suggested which plant was more appropriate to the site.
Time for a Change
Dana wrote ” There were really three incentives to enlarging the garden area. First, I liked the garden that was there, but to me it always looked a bit too small. I’d enlarged the margins somewhat over the years, but never enough.
Then I read Doug Tallamy’s new book, Nature’s Best Hope and decided to follow as many of the 10 concrete steps each of us can take in our own yards as possible.
My notes in a nutshell (Chapter 11 Nature’s Best Hope)
- Shrink the lawn
- Remove invasive species
- Plant keystone genera
- Be generous with planting
- Plant for specialist pollinators
- Network with neighbors
- Pay attention to hardscapes- covering window wells for example
- Create caterpillar pupation sites under trees
- Don’t spray or fertilize
- Educate neighborhood civic Associations
This included getting rid of lawn – equivalent to an ecological desert – and creating perennial beds under trees so that insects could complete their life cycles above and below ground.
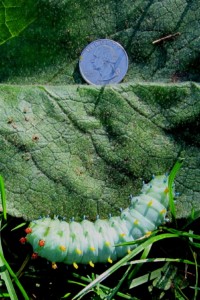
Cecropia moth caterpillar under Dana’s cherry trees
Why the front garden? First it was doable for me, and second, several years ago my son found a Cecropia moth caterpillar in the grass there. It was an amazing 3″ long work of art and color that was in danger of being killed by a lawnmower or the lack of habitat in the dense, impenetrable soil.
The front of my house has been a wren nesting site for years, and Tallamy’s book describes the hundreds of caterpillars needed to raise a brood. Well, maybe the Cecropia caterpillar, which is as big as a house wren, wasn’t the meal they were looking for, but I could give them more options.
Put it all together and the garden was conceived. Save the insect life, save the bird life, save the ecosystem.”
Doug Tallamy rates the black cherry – another plant we have been taught to regard as a weed tree – as the second most biologically productive tree in North America, so Dana was starting off ahead of the game.
But where to start? She was stumped. Time for some creative brainstorming.
HOW WE LAID OUT AND PREPARED GARDENS
Getting a Feel for the Design
- Don’t just make bigger, separate beds, think of the whole area as one big garden with paths running through.
- Embrace the feeling of a grove by including the trees within the bed
- Where do you want to walk? Think of the lawn outside the bed as a shape to design and the paths as rivers and brooks for a feeling of flow.
- Tie it in with existing plantings. Continue the line of foundation and entry garden beds and repeat some of the plants in those beds.
- Consider what do you want to see as you drive into the yard? From the house? From your favorite looking-out window? Are there any views you’d like to block?
Laying It All Out
Some of us would never get around to garden-making if we had to design on paper first. I, for one, have a strong intuitive feeling for land, for its character and plants and how I want to move through space. I’d rather work directly on the ground.
We experience a landscape with our bodies and all our senses. That’s how I approach what I call site specific, plant-centered design. I may look odd as all get-out drawing in the air with my hands and pacing around, but that’s how I get a sense of flow and connectivity.
Here’s how we figured it out
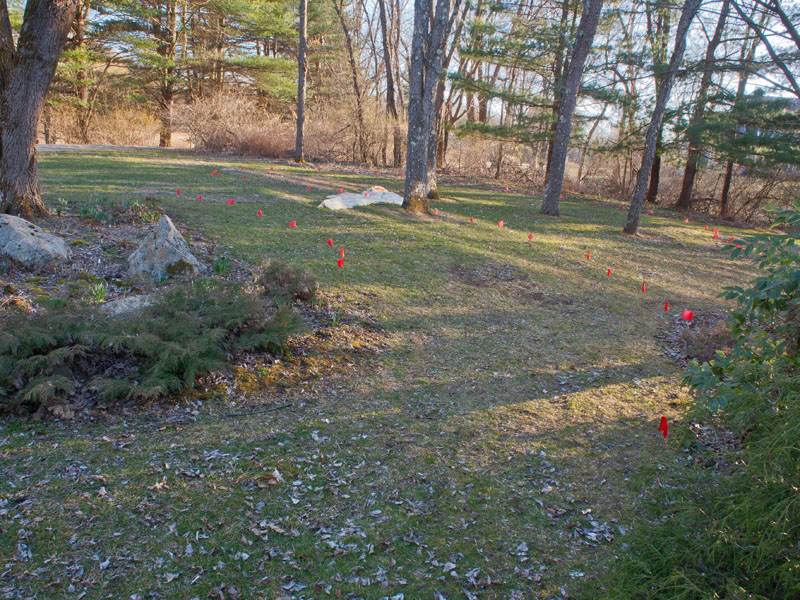
- I walked around to “draw” what felt like a natural perimeter for a bed that would connect the existing island bed (on the left in the photo above) to the cherry trees and merge into the foundation planting along the side of the house.
- Then I walked it again, slowly, so Dana could stick flags in the ground behind every footstep.
- Oops – too big, don’t want to bite off more that we can chew. Easy enough to move the flags til it felt right.
- We planned to make the inside edge of the existing island bed one side of a wide grass path between the new garden and the old one. So we drew that line with flags, adjusting until both the line and the proportion of the bed felt right.
- Then we set another row of flags about 8′ from that line, measuring with a stick, to set the width of the path.
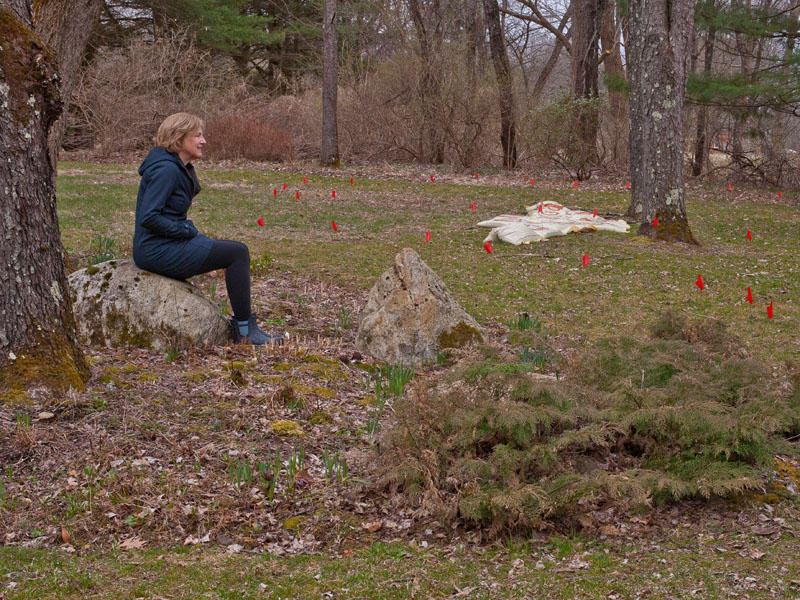
Then it was time to live with it, to walk around and sit on a rock and just look.
Time spent looking is every bit as important as doing and moving flags is a whole lot easier than digging.
After walking the area for a day or so, Dana realized that it would be better to make the path through the garden a less obtrusive mulch path, to give the feeling of one large garden.
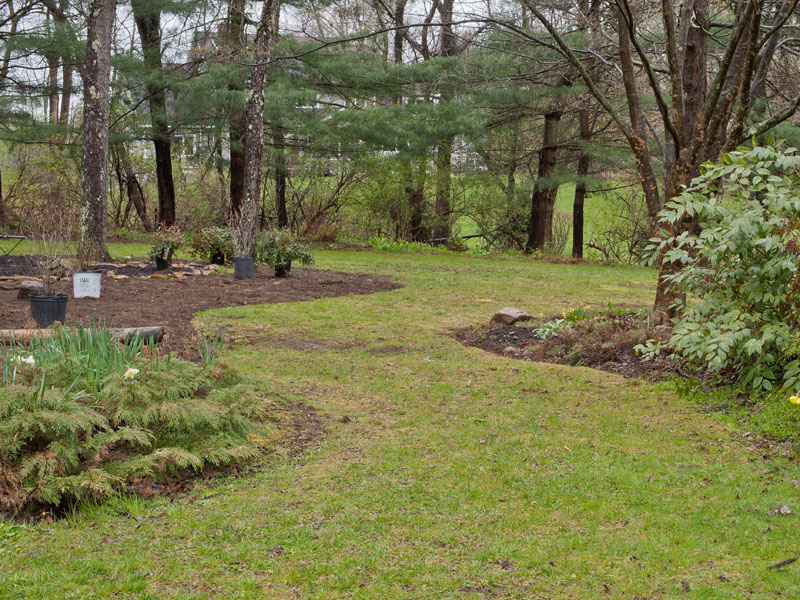
A better idea for locating the grass path
- We re-drew lines for a wide grass path to curve around the corner of the house, using the edge of the corner bed (right side of photo above) as a guide. This new path connects back yard and front yard lawns.
- The opening and constricting of space draws you right in, compels you to follow the path and see what’s around the corner. And, as I always say, a long slow grass curve creates flow and is easy to mow.
- Dana edged everything, which made the whole thing instantly legible. It all felt just right.
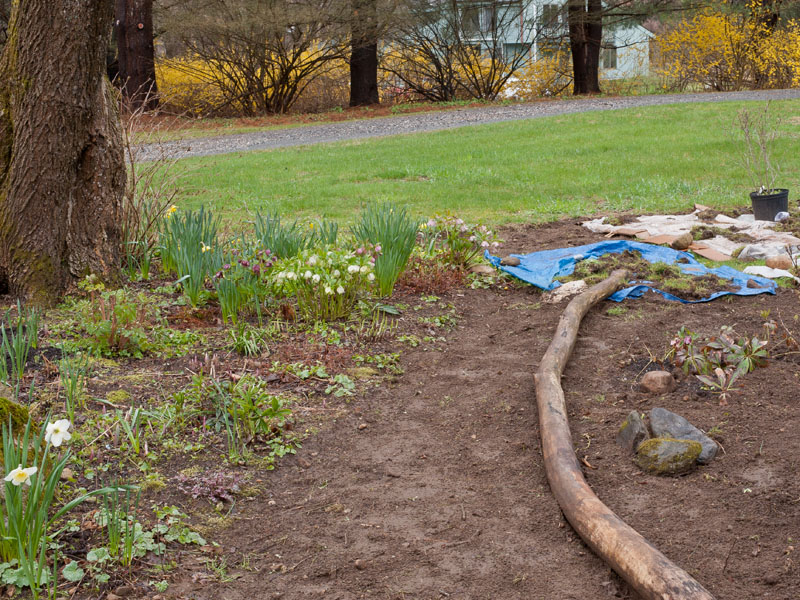
Curved log makes a good edge
Then she found a fallen branch with a lovely curve, the perfect edge for a woodland garden path.
The plan was to kill lawn grass and improve soil by laying down cardboard covered first with compost, then shredded hardwood bark mulch to hold it all in place.
- After doing a little dumpster diving for cardboard and lugging expensive bags of compost, Dana decided to just dig out (and compost) the rest of the grass. It was shallow rooted and not all that hard to remove.
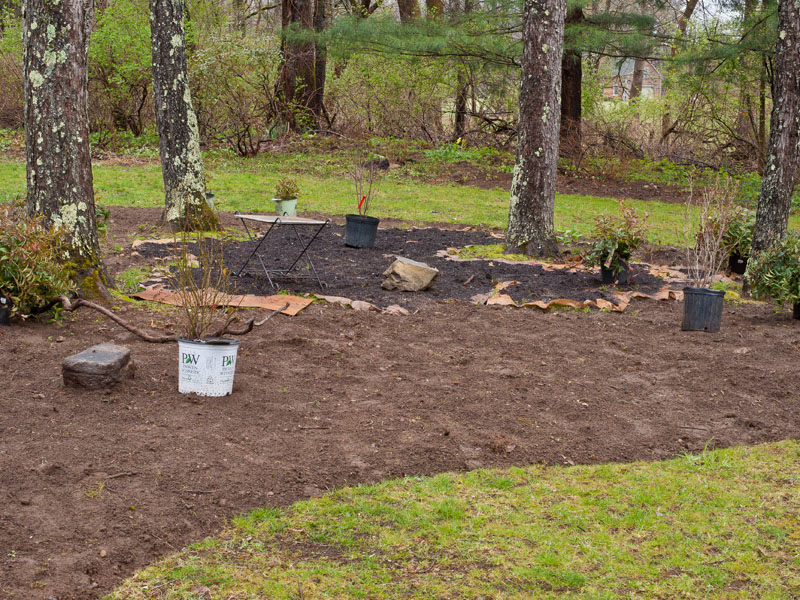
We were creating a woodland garden, but it didn’t have the kind of fungal-dominated woodland soil created when leaves fall and decompose year after year – because the lawn guys kept blowing fallen leaves into the woods year after year. That’s going to change.
- A truckload of leaf mold (composted leaves) would have been ideal, but it simply wasn’t available.
- So she ordered a delivery of Sweet Peet, a locally produced soil-enriching composted mulch to spread over the whole area and let decompose over time. Compost would be reserved for areas to be planted soonest.
- The shady grove seemed like an inviting place to sit or dine on a hot sunny afternoon, so we marked a spot amongst the trees with a spare table. We played around with placing a few container-grown shrubs and rocks.
Even small and still in pots, the first few shrubs we placed created a sense of enclosure around the seating area. They suggested how to mass larger plants and how many more would be needed. But none would be planted until we poked around (gently) with a piece of rebar to find pockets of deeper soil between tree roots.
As for plant choices – I’ll write about that later as planting progresses … stay tuned